The Benefits of Curling with a Straightener
Curling your hair with a straightener offers distinct advantages over traditional curling irons. One major perk is the ability to create varied curl styles with one tool. From tight ringlets to loose beach waves, a straightener can do it all.
Straighteners are highly convenient, combining two functions in one device. This not only simplifies your styling routine but also saves space when traveling. There’s no need to pack multiple styling tools, making it ideal for those on the go.
Moreover, using a straightener gives you better control over the look you want to achieve. You can easily adjust the angle and tension to create different curl patterns. Here are some specific benefits:
Ability to create multiple styles: curls, waves, and straight hair.
Saves space in your beauty kit: one tool, many styles.
Better control over the curl’s direction and shape.
Overall, the versatility of a straightener makes it an excellent choice for those looking to master various hairstyles. The control and ease of use make it a favorite among hair enthusiasts. Whether you need a quick touch-up or a complete look, a straightener has you covered.
Tools and Products Needed
To achieve stunning beach waves with a straightener, you’ll need a few key tools and products. First, choose a straightener with rounded edges, as this shape helps create smoother curls. You should also have a heat protectant spray to shield your hair from heat damage. A light hold hairspray will help set the curls without making them stiff or sticky.
For the process to be smooth and efficient, it’s helpful to have some additional items on hand. Hair clips will keep sections of your hair separated and manageable. A wide-tooth comb can detangle without frizzing your hair. To enhance your final look, consider a shine spray for a polished finish.
Here’s a quick list of what you’ll need:
Straightener with rounded edges
Heat protectant spray
Light hold hairspray
Hair clips
Wide-tooth comb
Shine spray
Having these tools and products ready will make the styling process more effective and enjoyable. Remember, investing in quality products makes a noticeable difference in the results. With the right essentials, you’re well-equipped to create beautiful beach waves.
Preparing Your Hair
Before you start curling, it’s essential to prepare your hair adequately. Begin with clean, dry hair to ensure the curls set well and last longer. Proper preparation helps reduce potential heat damage and enhances the final result.
Here’s a simple preparation checklist:
Use a microfiber towel to dry hair and reduce frizz.
Detangle gently with a wide-tooth comb or brush.
Ensure your hair is completely dry to avoid heat damage.
Taking these steps will create a smooth base for your beach waves. You’ll notice a significant difference in how your curls look and last when you invest time in preparation. Adequate preparation lays the foundation for effortless, stunning waves.
Washing and Drying
Washing your hair correctly is the first step to achieving perfect curls. Use a gentle shampoo and conditioner that suits your hair type. This ensures your strands are clean and ready for styling.
Washing your hair correctly is the first step to achieving perfect curls. Use a gentle shampoo and conditioner that suits your hair type. This ensures your strands are clean and ready for styling.
Steps for washing and drying:
Choose the right shampoo and conditioner.
Gently wring out excess water using a towel.
Let your hair air dry or use a low-heat setting on a blow dryer.
Remember, starting with properly dried hair allows your curls to form more naturally and stay intact longer.
These simple techniques can significantly affect the overall outcome of your styling efforts.
Applying Heat Protectant
Before you curl your hair, applying a heat protectant is essential. It acts as a barrier, preventing heat damage and keeping your strands healthy. Choose a product suitable for your hair type for optimal protection.
Distribute the heat protectant evenly throughout your hair. This helps to avoid uneven damage and ensures consistent curling results.
Steps to apply heat protectant:
Select a heat protectant spray or serum.
Apply it to damp or dry hair, focusing on the ends.
Comb through to ensure even coverage.
By incorporating this simple step, your hair will remain in top condition while achieving the beach waves you desire. This small effort leads to stronger, shinier hair in the long run.
How to Curl Hair with a Straightener
Curling hair with a straightener is straightforward once you get the hang of it. Begin by selecting a straightener with round edges. This shape helps create smooth, flowing curls without sharp lines.
To start, clamp the straightener at your roots with a small section of hair. Twist it gently away from your face and glide it slowly down the hair shaft.
Steps to curl your hair with a straightener:
Clamp the straightener close to the roots.
Twist the device while keeping it moving.
Glide down the length, maintaining a smooth motion.
Practice makes perfect. With time, you’ll master this technique for creating beautiful beach waves.
Sectioning Your Hair
Properly sectioning your hair ensures every strand gets the perfect curl. It also makes the process faster and more organized. Start by dividing your hair into manageable sections.
Use hair clips or ties to separate these sections. Create layers by clipping the top portion up and beginning with the bottom layer.
Consider these tips for sectioning:
Divide hair into 2-3 inch sections.
Clip away the top layers to reach the bottom.
Work from the base of your skull upwards.
With efficient sectioning, you’ll streamline curling for an even, consistent look. This method prevents overwhelming tangles and helps each curl shine.
The Basic Curling Technique
Mastering the basic curling technique with a straightener is key to achieving those stunning beach waves. With your straightener on and heated to the appropriate setting, start with a section of hair. Place the straightener close to the roots for maximum volume.
Here are some quick tips:
Maintain a consistent twist as you glide.
Apply light pressure to prevent pulling.
Rotate the hair away from your face for a natural look.
Continue this process across all sections. Remember, alternating the direction of each curl creates a more natural wave pattern. Practicing this technique is crucial. With time, you’ll develop a rhythm that produces perfect curls effortlessly. This consistency will translate into a beach-ready hairstyle that holds throughout the day.
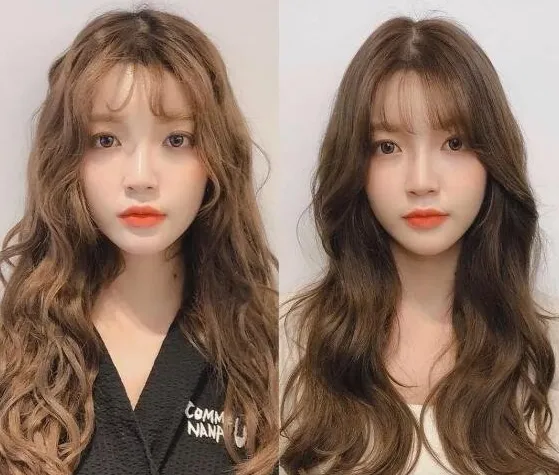
Creating Different Styles of Beach Waves
Beach waves can vary greatly in style and texture. The key lies in altering your technique slightly to achieve different effects. With a straightener, you can experiment and find the perfect wave to match any occasion.
Consider these variations:
Loose Beachy Waves: Use larger sections for a relaxed look.
Defined Beach Curls: Opt for smaller sections for tighter curls.
Messy Beach Texture: Alternate curl directions and section sizes.
Experimenting with these styles allows you to personalize your beach waves. By adjusting section size and curl direction, you can create anything from polished curls to a carefree, undone texture. Mixing techniques keeps your style fresh and versatile, perfect for any setting.
Loose Beachy Waves
Creating loose beachy waves is all about subtle elegance. This relaxed style is perfect for daytime outings or casual evenings. The secret is to use wider sections of hair, allowing the curls to form gently. This technique results in a soft, laid-back look with plenty of movement.
To achieve loose beachy waves, follow these steps:
Select larger sections: Work with sections about two inches wide.
Adjust the angle: Hold the straightener at a slight angle for softer curls.
Glide smoothly: Move slowly down each section, maintaining gentle pressure.
For an airy, effortless finish, avoid overly defining the curls. Letting them cool naturally helps them set in place with a light touch. Consider using a texturizing spray for added volume and a touch of sea breeze charm. This approach keeps the waves loose while allowing your natural hair pattern to shine through.
Defined Beach Curls
Defined beach curls offer a polished yet relaxed look. This style is great for occasions when you want a bit more drama. The key is to use smaller hair sections and maintain a consistent curl pattern. Defined curls provide texture and volume, enhancing the overall aesthetic.
To craft these curls, try the following:
Opt for smaller sections: Use one-inch sections for tighter curls.
Twist with precision: Wrap each section tightly, focusing on even twists.
Control the tension: Keep steady pressure as you move the straightener.
Allow each curl to cool before styling further. This solidifies the curl structure, retaining its shape longer. Finish by gently separating the curls with your fingers for a more natural look. A light finishing spray can ensure the curls remain intact throughout the day. This method highlights your hair’s texture and brings out the depth and definition in each wave.
Messy Beach Texture
Messy beach texture offers an effortlessly chic vibe. This style suits individuals looking for a laid-back yet stylish appearance. It’s about embracing imperfection for an organic, sun-kissed look.
To achieve this texture, follow these steps:
Use larger sections: Grab slightly bigger chunks for an uneven curl pattern.
Alternate directions: Curl some sections towards and some away from your face.
Avoid too much uniformity: Create varied curl tightness to enhance the messy look.
These variations create depth, making the style appear naturally tousled. After curling, use your fingers or a wide-tooth comb to gently break up the curls. This adds volume and enhances the messy effect. A salt spray can be applied to amplify texture and bring out the beachy feel. Finish by scrunching your hair lightly to encourage movement and wave. This carefree look requires minimal upkeep and is perfect for casual outings.
Tips for Lasting Beach Waves
Creating beach waves is just the beginning; making them last all day can be tricky. Some strategic approaches ensure your waves stay put without much fuss.
Consider implementing these tips for longer-lasting waves:
Allow curls to cool: Let your curls cool completely before touching. This helps set their shape.
Use a texturizing spray: This product helps lock in the curls’ texture without adding weight.
Avoid heavy products: Opt for lightweight styling products that enhance curls without weighing them down.
Incorporating these techniques will help maintain the shape and bounce of your beach waves throughout the day. Refresh curls as needed with a little spritz of water or product to revive their form. With the right care, your waves will remain effortlessly beautiful until your next hair wash.
Setting the Curls with Hairspray
Properly setting your curls is essential for achieving long-lasting beach waves. Hairspray is your best ally in this process. Choose a light hold hairspray to ensure your waves stay in place without becoming stiff.
To effectively set your curls:
Spray from a distance: Hold the hairspray about 12 inches away from your hair.
Apply lightly: Spray evenly, covering all the curls without overdoing it.
Let it dry: Allow the hairspray to dry naturally without touching the curls immediately.
By following these steps, your beach waves will maintain their shape and bounce. Remember, less is more when it comes to hairspray. The key is to achieve a flexible hold that keeps your curls intact without compromising their natural appearance.
Avoiding Frizz
Frizz can ruin even the best set of beach waves. To maintain sleek curls, start with a good quality shampoo and conditioner designed to combat frizz. This provides a smooth base for styling.
Additional ways to minimize frizz include:
Use a microfiber towel: After washing, gently blot your hair instead of rubbing.
Apply anti-frizz serum: Before curling, distribute a pea-sized amount through your hair.
Avoid humidity: Protect your styled hair with a light, anti-humidity spray.
By incorporating these practices into your routine, you can achieve beautiful, frizz-free waves. Remember, preparation is crucial for maintaining a polished look throughout the day.
Conclusion
Mastering how to curl hair with a straightener can transform your styling routine. With practice, creating stunning beach waves will become second nature. The key lies in preparation, technique, and patience.
It’s important to choose the right straightener and use the proper products. By following the steps, you’ll achieve curls that last and look flawless. Don’t be discouraged by initial trials; skill develops over time.
Feel free to experiment with different techniques. This allows you to find what works best for your hair type. Embrace the versatility of your straightener for various looks. Enjoy the confidence that comes with perfecting your beach waves.