Important Safety Precautions (Must Read Before Use!)
Never use on wet hair: Hair must be completely dry before using the straightener! Wet hair exposed to high heat will instantly vaporize (the “sizzling” sound), causing serious, irreversible damage to the hair’s internal structure (the cortex), leading to bubbling or even breakage (“bubble hair”).
Preheating & Placement: When preheating and after use, always place the straightener on a heat-resistant stand, away from flammable items (like paper towels, fabrics, cosmetics) and children. Never place it on a sink, plastic surface, or let it touch your skin.
Beware of Burns: The plates and edges of the straightener get extremely hot. Avoid touching these parts during use. Be careful not to burn your ears, neck, or forehead.
Temperature Selection: Higher temperature is not always better! Always choose a suitable temperature based on your hair type (detailed below).
Regular Cleaning: Product buildup (hairspray, styling products) on the plates affects heat conduction and can scorch your hair. Regular cleaning is crucial (wipe with a damp cloth or dedicated cleaner after it has cooled down completely).
Tools You'll Need
Hair Straightener (Flat Iron)
Wide-Tooth Comb
Fine-Tooth Comb or Tail Comb (for sectioning)
Heat-Protectant Products (Optional but Highly Recommended):
Heat Protectant Spray/Cream: Forms a protective barrier before heat application, reducing damage.
Anti-Frizz Serum/Oil: Adds shine and smooths frizz after styling.
Hair Clips or Hair Ties (for sectioning and securing)
Heat-Resistant Gloves (Optional, safer for handling the hot iron immediately after use)
Detailed Step-by-Step Instructions
1. Preparation
Thoroughly Clean & Dry Hair: Wash your hair and completely dry it with a blow dryer. Ensure there is absolutely no dampness.
Detangle: Use a wide-tooth comb to thoroughly detangle your hair, removing all knots. This ensures the straightener glides smoothly and prevents tugging.
Sectioning: This is key for even results!
Divide hair into top and bottom layers (using a horizontal part from ear to ear).
Secure the top layer to the crown of your head with clips or ties.
Further divide the bottom layer into smaller sections (about 2.5-5 cm wide, depending on hair thickness and straightener plate width). Thinner sections yield straighter, longer-lasting results but take more time.
Apply Heat Protectant: On dry hair, evenly spray or apply heat protectant spray/cream to the entire sectioned hair, focusing on the mid-lengths and ends (most damaged areas). Ensure even coverage. Let it absorb/dry for a moment.
2. Choose the Right Temperature
Fine/Thin, Damaged, Color-Treated/Chemically Processed Hair: Use the lowest setting (approx. 130°C – 160°C / 265°F – 320°F). This hair is fragile; high heat causes breakage, dryness, and color fade.
Medium/Normal Hair: Use a medium setting (approx. 160°C – 180°C / 320°F – 355°F). Balances results and potential damage.
Thick/Coarse, Dense, Stubborn Natural Curls: May need higher temperatures (approx. 180°C – 200°C / 355°F – 390°F). Always try a lower setting first, increasing only if needed. Avoid exceeding 200°C / 390°F.
Beginner Tip: Regardless of hair type, start at a lower temperature (e.g., 160°C / 320°F). If results aren’t ideal (not straight enough or doesn’t last), increase in 10-15°C / 20-30°F increments. The lowest temperature that achieves your goal is the best temperature.
Note: Most straighteners heat up quickly (30 sec – 1 min). Wait patiently until it reaches the set temperature. An indicator light usually signals when preheating is complete.
3. Straightening
Take the First Section: Start with the very bottom section, closest to your neck.
Detangle the Section: Use a fine-tooth or tail comb to detangle this section again, ensuring it’s perfectly smooth and knot-free.
Position the Straightener:
Clamp the straightener about 1-2 cm (½ – 1 inch) away from the scalp (never clamp directly at the roots – risks scalp burns and unnatural flatness).
Close the plates firmly, ensuring the hair section is evenly clamped between the center of the plates, preventing hair from slipping out at the edges.
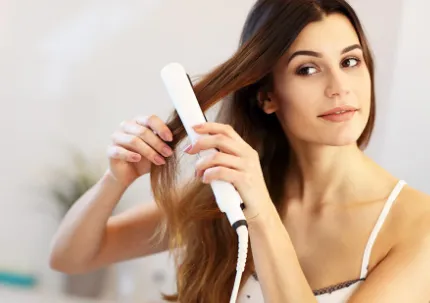
Glide Down Steadily:
KEY ACTION: Keeping the plates clamped shut, glide the straightener down the hair shaft towards the ends at a slow, steady, and consistent speed (approx. 10-15 cm / 4-6 inches every 5-8 seconds).
Avoid Holding: Never hold the iron in one spot for too long (especially at high heat). 1-2 seconds is usually sufficient, or you risk scorching your hair!
Keep it Steady: Keep your wrist stable, ensuring the straightener stays parallel to your scalp. Avoid twisting or pulling the hair.
Release at the Ends: As you reach the ends, don’t yank the iron away. Continue clamping and glide smoothly off the ends to prevent splitting or flipping.
Check the Result: Release the plates and check if the hair is straight. If not straight enough or still curly, wait for that section to cool slightly, then repeat steps 3-5 once. Usually 1-2 passes are enough.
Move to the Next Section: Release the next section and repeat steps 2-6 until the entire bottom layer is done.
Process the Top Layer: Release the secured top layer, divide it into smaller sections, and repeat steps 2-7. Pay attention to the direction of sections on the crown and back of the head, ensuring the straightener glides in the direction the hair grows for smoothness.
4. Finishing & Styling
Cool & Set: Let your hair cool down naturally for a moment after straightening; this helps the style set and last longer.
Smooth Frizz:
Take a small amount of anti-frizz serum or hair oil (1-2 drops, pea-sized), rub between palms.
Apply mainly to mid-lengths and ends, smoothing gently with your hands or palms running down the hair. Avoid the roots (causes greasiness and flatness). This adds shine and tames flyaways/frizz.
Check Overall Look: Check in the mirror for any missed sections or uneven areas and touch up as needed.
Add Volume (Optional): If the top looks too flat, once hair is cool, gently lift the roots at the crown. Spray lightly with volumizing spray or use a round brush with a blow dryer to add a little lift at the roots.
Advanced Techniques
Creating Inward/Outward Flicks: After straightening a section, as you reach the ends, gently turn the straightener slightly inward (for an inward flick) or outward (for an outward flick), holding for about 1 second.
Creating Natural Bends: Only straighten from the roots to mid-lengths. As you reach the ends, gently turn your wrist outward or inward to create a soft bend, avoiding harsh, blunt ends.
Styling Bangs/Fringe: Bangs are usually finer. Use a slightly lower temperature (or the bangs setting if available) and work quickly to avoid over-straightening and stiffness. A slight bend is often more flattering.
Essential Hair Care Points (Minimize Damage!)
Always Use Heat Protectant: This is the MOST crucial protective step before any heat styling. Non-negotiable.
Limit Frequency: Minimize how often you use the straightener. 1-2 times per week is a safer range. Daily use, even with protection, causes cumulative damage.
Regular Deep Conditioning: Use a deep conditioning hair mask or treatment 1-2 times per week to replenish lost protein and moisture, repairing damage.
Trim Ends Regularly: Get regular trims to remove dry, split ends, preventing splits from traveling up the hair shaft.
Choose a Quality Straightener:
Accurate Temperature Control: Multiple settings with a display are best.
Plate Material: Ceramic, Tourmaline, and Titanium are standard. Ceramic/Tourmaline are gentler, reduce static; Titanium heats fastest, best for thick/coarse hair, but can run hotter.
Ionic/Far Infrared Function: Ionic technology reduces static/frizz; Far Infrared heats more evenly. These features help minimize damage and boost shine.
Plate Width: Choose wider plates (>3cm) for long/thick hair for efficiency; narrower plates (<2.5cm) suit short hair/bangs.
Floating Plates/Spring Tension: Automatically adjusts to different section thicknesses for more even clamping.
Common Mistakes & How to Avoid Them
Mistake: Using the straightener on wet hair.
Avoid: Hair MUST be 100% dry!
Mistake: Temperature too high or holding too long in one spot.
Avoid: Choose temp based on hair type, start low; Glide slowly and steadily, never pause.
Mistake: Poor sectioning, sections too thick.
Avoid: Section meticulously; thinner sections ensure thorough, even straightening.
Mistake: Skipping heat protectant.
Avoid: ALWAYS apply heat protectant before use!
Mistake: Clamping directly at the roots.
Avoid: Start clamping 1-2 cm (½ – 1 inch) away from the scalp.
Mistake: Pulling/tugging hair.
Avoid: Ensure hair is detangled; let the straightener glide smoothly down, don’t pull.
Mistake: Never cleaning the plates.
Avoid: Clean plates regularly (at least weekly) after they have cooled down.
Conclusion
Using a hair straightener might seem simple, but mastering the correct technique and developing good hair care habits is essential. Remember the core principles: Dry hair only, meticulous sectioning, suitable temperature, steady gliding, heat protection, and regular deep care. By following this guide, you can minimize heat damage while effortlessly achieving healthy, smooth, shiny, perfect straight hair!
May you enjoy gorgeous, envy-worthy hair!